| Previous | Home | Next |
Step 1: Download Eclipse IDs
For this tutorial, I’m going to use Eclipse, because frankly it’s the easiest and most hassle-free development tool for Android right now.
click here to download Android
Step 2: Download Java Development Kits
If you don’t have it already, you need to download the Java JDK 1.6 and above version.
click here to download Java Development Kit (JDK)
Step 3: Download The Android SDK Tools
Next Step, you will need to get the Android SDK Tools straight from Google. Unpack and install this to a directory you’ll remember – you need to reference this in the next few steps.
click here to download Android SDK Tool
Step 4: Configure The Android SDK Tool
After download the Android SDK Tools, you will be unpacked the android SDK. Firstly, you will find a file named “SDK Setup.exe.” Start that file .the following dialogue should appear.

For me, however, I only really want to program for Android 2.2, so those are the only API packages I bothered to get (someday I may pay for my folly, but not today). Either way, get what you want (and you do need to pick one) and hit install.
Step 5:- Set Up Your Android Virtual Device (AVD)
Now that you have finished yet another painful download, click over to “virtual devices”. We are going to create an Android device that will test run your programs for you! Hit “New” to create a new Android device, and put in the specifications that you want it to have. Show in the screenshot below.
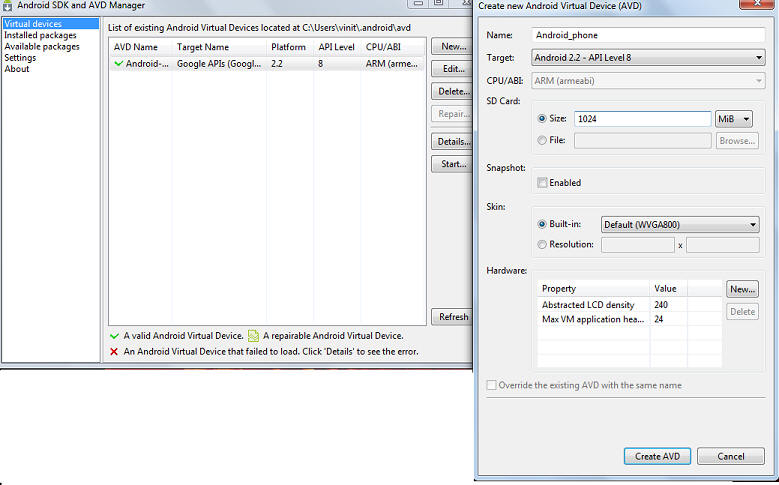
Note:Click “Create AVD” to–well–create your AVD.
Step 6 : Select Your AVD
Next step ,select your AVD from the list, and hit “Start” to make sure that you do indeed have a working emulation of an Android phone.
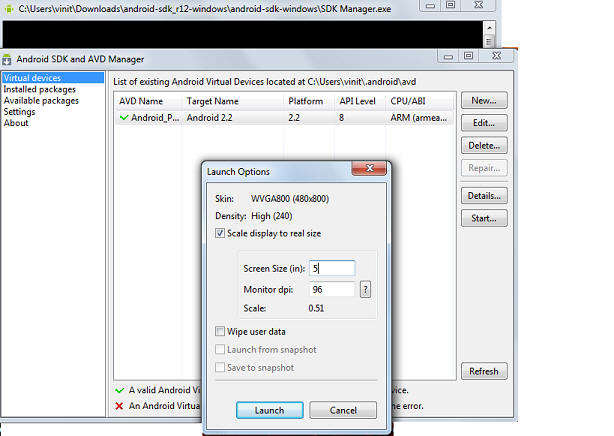
After a pretty lengthy start-up wait, it should look something like this.
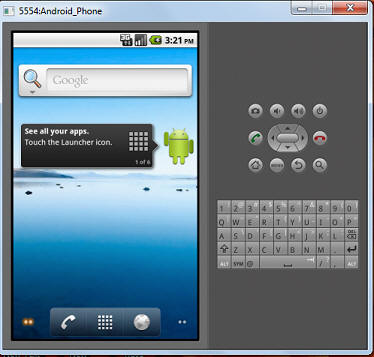
Step 7: Installing the ADT Plugin for Eclipse
Now, Installing the ADT plugin in eclipse, so start Eclipse and follow these step.
- Click the Help in eclipse, and select this option ‘Help>Install New Software‘.
- Hit “Add…” and for the name, type “Android”
- Set the link to “https://dl-ssl.google.com/android/eclipse/” .
- finally,Click “OK” and the following should appear.
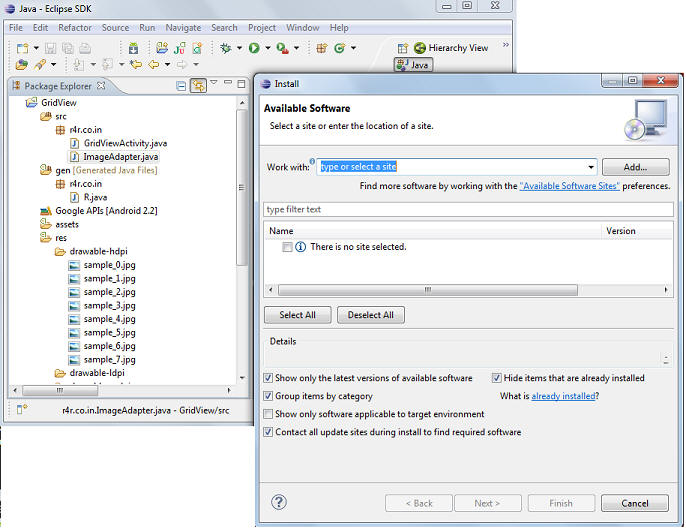
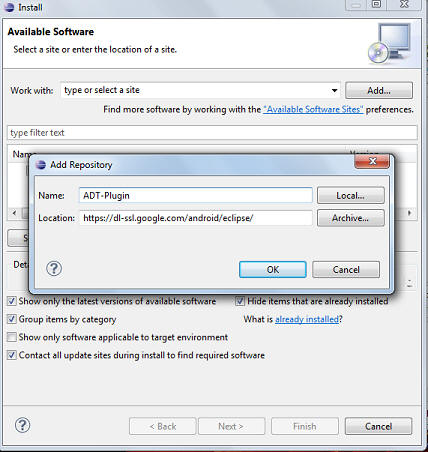
Now , select both of the resulting packages, and hit next.
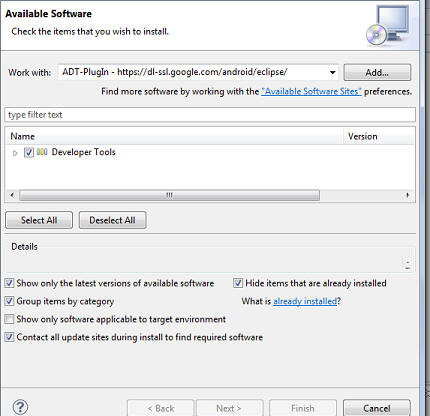
This will download the Android ADT (Android Development Tools). Go ahead and start the download to obtain these all packages and restart Eclipse (it should prompt you to on completion of the downloads)
Step 8: Configure Eclipse Again
This step, we will remember that Android SDK we got earlier? We didn’t do anything with it. Now, At this time to tell Eclipse where it is so Eclipse can use it as a resource and follow these step:
- Open Eclipse and navigate to Window>Preferences
- Select the Android tab.
- As shown below, browse to the location of your Android SDK
- Click the “Apply“ button.
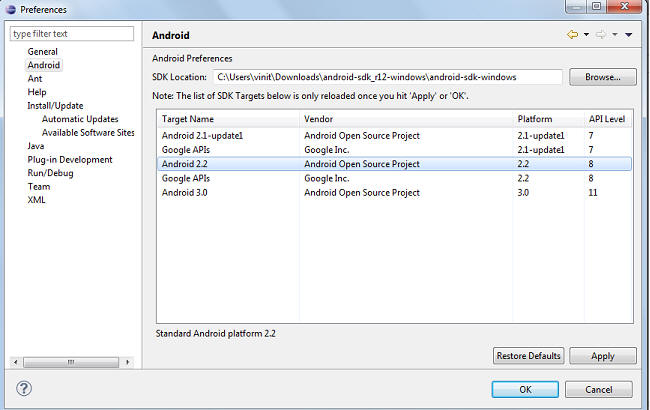
Step 9 : Create A New Project
Now, we are ready to start coding. We discuss the some step to create a new project.
- Open Eclipse and navigate to ‘File->New->project->Android->Android Project‘ and click OK.
- Write a project name, as well as some other details. You can create the own package name. eg. r4r.co.in etc and Create Activity. by default Activity name same as project name eg. WelcomeActivity .
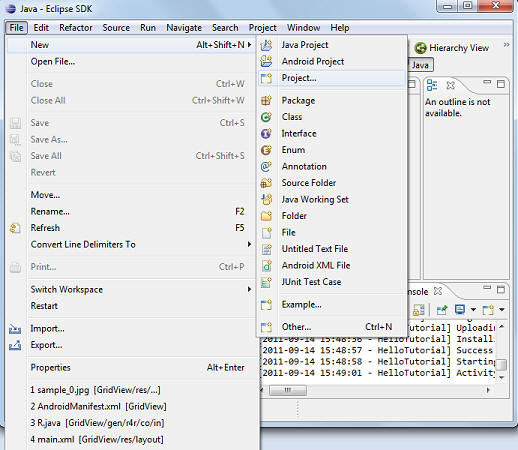
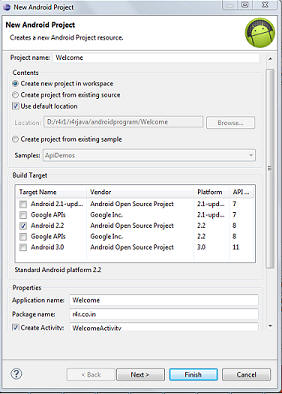
After the click finish button. Show next step in below picture.
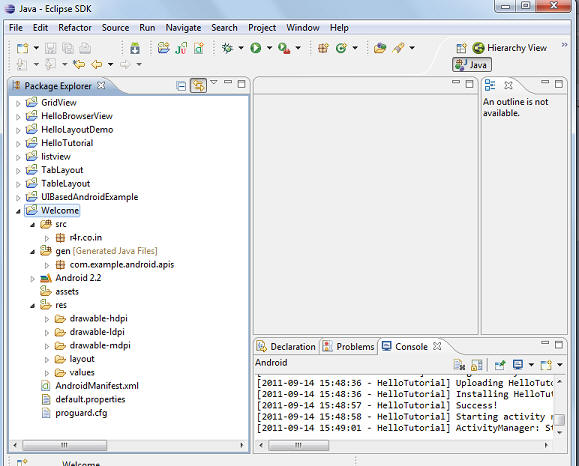
Step 10: Input Your Code Depend Own Need
In the tree on the left, show many folder like src, gen, res etc.
- src In the“src” folder and expand everything. Go to the file with the name of your “Activity” which is created in step 9. and double click it to see the contents. Now Create WelcomeActivity.java file.
- gen In this folder, Create only one java file that is create by default R.java name This is Auto generated file and we can not modify in this file.
- res This folder have many folder like drawable ,layouts and values. In drawable folder ,We can have any type icon images , and layouts folder is used for layout .This folder contain main.xml file. In this file ,we can set your own layout which you want.
- and values folder have string.xml file .In this file ,we can write a string which you want to print
package r4r.co.in;
 import android.app.Activity;
 import android.os.Bundle;
 public class WelcomeActivity extends Activity {
 /** Called when the activity is first created. */
 @Override
 public void onCreate(Bundle savedInstanceState) {
super.onCreate(savedInstanceState);
setContentView(R.layout.main);
 }
   }
/* AUTO-GENERATED FILE.  DO NOT MODIFY.
 * This class was automatically generated by the
 * aapt tool from the resource data it found.  It
 * should not be modified by hand. */
package r4r.co.in;
public final class R {
    public static final class attr {
    }
    public static final class drawable {
        public static final int icon=0x7f020000;
    }
    public static final class layout {
        public static final int main=0x7f030000;
    }
    public static final class string {
        public static final int app_name=0x7f040001;
        public static final int hello=0x7f040000;
    }
}
?xml version="1.0" encoding="utf-8"?>
<LinearLayout xmlns:android="http:
//schemas.android.com/apk/res/android"
    android:orientation="vertical"
    android:layout_width="fill_parent"
    android:layout_height="fill_parent" >
<TextView
    android:layout_width="fill_parent"
    android:layout_height="wrap_content"
    android:text="@string/hello" />
</LinearLayout>
<?xml version="1.0" encoding="utf-8"?>
<resources>
    <string name="hello">Welcome,
	This is R4R Tutorial!</string>
    <string name="app_name">Welcome</string>
</resources>
Step 11: Finally Run Your Program
This is finally step, when your application is complete then you want to execute the application. Now, Above your code, you’ll see a little green “Play” button (or navigate to ‘Run>Run‘) or second method, select the application and click the right button and click the runas icon and select the "AndroidApplication" and click it.It will prompt you to save changes; hit yes.
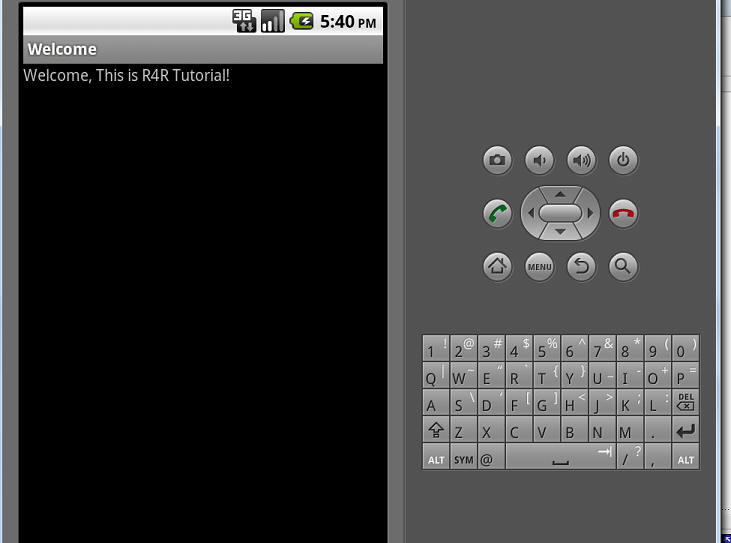
Now you get to wait an eternity while your virtual device boots up.After everything’s done loading, your application should upload and start automatically. Which means that right after you “unlock” the device, you willll be greeted with your first Android program.I only captured the top half of the screen because the rest of it is black.
| Previous | Home | Next |