Struts2.0 Welcome Example using MyEclipse or Eclipse IDE
Struts2.0 Welcome Example using MyEclipse or Eclipse IDE
| Previous | Home | Next |
In this tutorial ,we will create the Struts 2.0 Welcome Application. This is the simple application to develop in Struts2.0 framework. Struts 2.0 framework provide the facilities to develop web application in java platform. If we are run this Struts 2.0 Welcome Example ,first create following file in MyEclipse and Eclipse IDE.
- index.jsp
- web.xml
- stryts.xml
- MyAction.java
- hello.jsp
Welcome Example using Struts 2.0 the following tool are required for run this exampleDirectory Structure of Welcome Example in Struts 2.0 Using MyEclipse or Eclipse IDE
- JDK 1.5
- MyEclipse IDE or Eclipse IDE
- Server Tomcat 6.0
- Struts 2.0 jar file
MyEclipse Directory Eclipse Directory

Step(1):-Open your MyEclipse or Eclipse IDE ,create work space in your application store.Step(2):-Select web project ,File>New>Webproject write Project name.Step(3):-Add the capability of struts 2.0 MyEclipse>Add Capability>Add Struts CapabilityStep(4):-Choose radio button version of struts 2.0 and click finish than see your project directory structure add the all struts 2.0 jar file.Step(5):-First you create index.jsp file in WebRoot folder in your application directory structure and write the following code:-index.jsp<%@taglib uri="/struts-tags" prefix="s"%> <s:form action="hello"> <s:textfield name="name" label="Name"/> <s:submit value="Submit"/> </s:form>Step(6):-web.xml file are default created in your project at the time of add capability of struts2.0 in MyEclipse IDE ,If you are use Eclipse IDE then copy the following code and paste in web.xml file you create in application directory structure.web.xml<?xml version="1.0" encoding="UTF-8"?> <web-app version="2.5" xmlns="http://java.sun.com/xml/ns/javaee" xmlns:xsi="http://www.w3.org/2001/XMLSchema-instance" xsi:schemaLocation="http://java.sun.com/xml/ns/javaee http://java.sun.com/xml/ns/javaee/web-app_2_5.xsd"> <filter> <filter-name>f1</filter-name> <filter-class>org.apache.struts2.dispatcher.FilterDispatcher</filter-class> </filter> <filter-mapping> <filter-name>f1</filter-name> <url-pattern>/*</url-pattern> </filter-mapping> </web-app>
Step(7):-This step you create struts configuration file this file name is struts.xml ,which are contain all information send by user and this request in which action class are invoked , if your action class contain more then one method than configure in this file and your request is process successfully then configure this string return by the action class which jsp page are open. The struts.xml page contain all information which send by user and string return by action class and also contain the information of interceptor if you want to add in your project. The welcome struts 2.0 example you create this file and write following codestruts.xml<!DOCTYPE struts PUBLIC "-//Apache Software Foundation//DTD Struts Configuration 2.0//EN" "http://struts.apache.org/dtds/struts-2.0.dtd"> <struts> <package name="demo" extends="struts-default"> <action name="hello" class="mypack.MyAction"> <result name="success">/hello.jsp</result> </action> </package></struts>
Step(8):-In this step your create action class , it means that index page form tag you sent this action then go in struts.xml file and read this request in which action class are mapped then go in action class which are mapped in struts.xml file and process the request or your business logic if process are success then return success string and not success then return error string. In welcome struts 2.0 example the following action class then return the success string in execute method ,and write following code in your action classMyAction.javapackage org.r4r; public class MyAction { private String name,password; public String execute(){ return "success"; } public String getName() { return name; } public void setName(String name) { this.name = name; } }
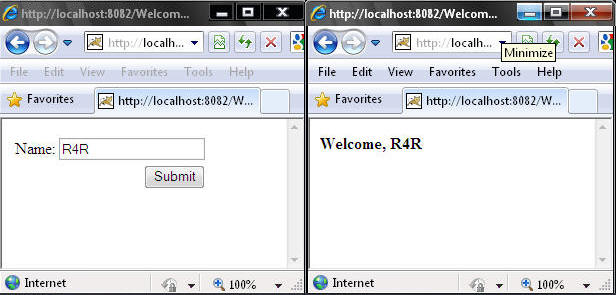
Step(9):-In this step the action class return string then check the configuration file which jsp page are mapped for result ,it means presentation logic and we want to show data which are store in action class use in result jsp page in property tag ,this tag provide struts 2.0 tag library to fetch data which are store in value stack . The welcome struts 2.0 example create hello.jsp page and write the following code.hello.jsp<%@taglib uri="/struts-tags" prefix="s"%> <b>Welcome, <s:property value="name"/></b>Step(10):-Configure the tomcat server in your myeclipse IDE and start the server or open in your browser.Step(11):-Deploy your project on the tomcat server and see on your browser then create following output
| Previous | Home | Next |