| Previous | Home | Next |
How to create a JSP web page in the Netbeans IDE 7.4 using the Tomcat Server 7.0.40.
In a JSP web page in the Netbeans IDE we must do the following three main steps:
- Start by creating a "Java web" -> "web application project".
- Create a JSP web file.
- Last and finally, start the Tomcat Server and deploy the project.
Step 1: Start creating web application project
Step 1(a): Open the Netbeans IDE to start your project.
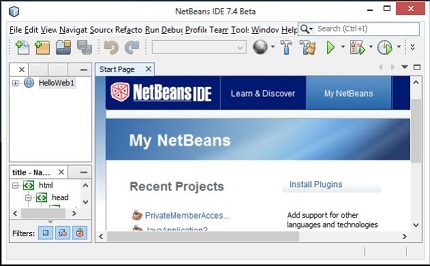
Step 1(b) : click on file menu and select New Project then select Java Web and then Web Application as follows.
Then we select "New Project" -> "Java Web" -> "Web Application" as in the following figure:
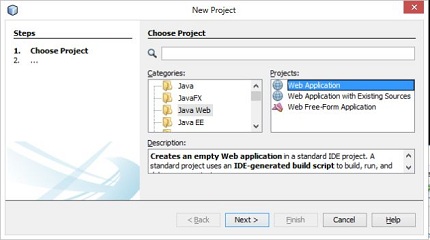
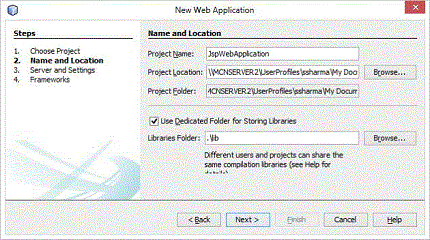
Step 1(c) :Now click on "Next". A new window is generated with a default project name.
Step 1(d) :A new window is generated for the server and setting and go to the server and click on "Add server".
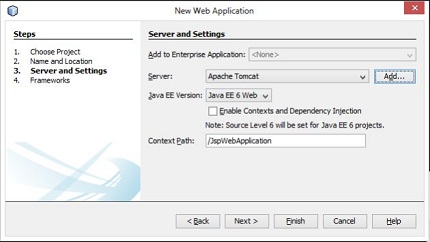
Step 1(e) : Then after server path you can see two more options for username and password.This is your choice whether you want your username and password or you want the default created by the Netbeans IDE. Now click on "Finish".
After that a window is generated containing the default index.jsp file.
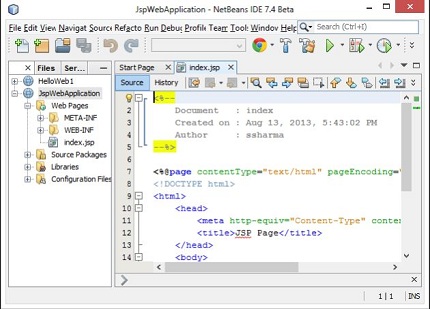
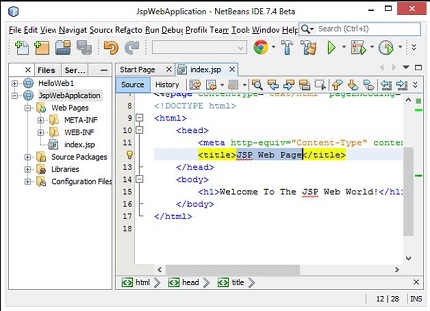
Step 2 Create a JSP Page : Now change some coding in the default JSP page as given below.
index.jspChange the title: JSP Web Page
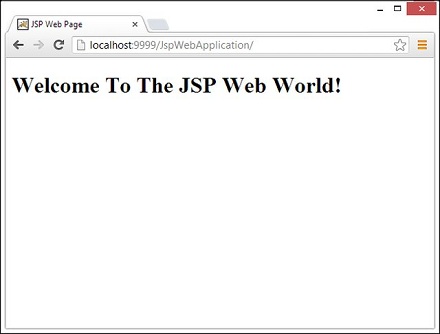
Change the heading: "Welcome To The JSP Web World!" as in the following:
Step 3 Run The Project using Tomcat Server
step 3(a) : At this time we recheck the Tomcat configuratio,then we have to changed the default port number of Apache Tomcat .After that we need to do the same in the Netbeans IDE.
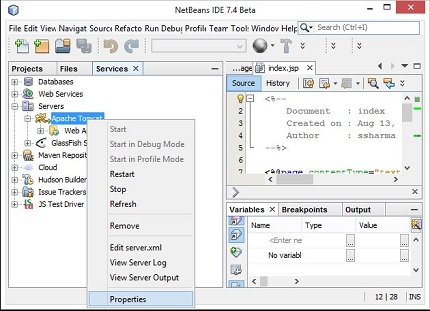
Then we go to the services menu and then click on "Servers" and then right-click on "Apache Tomcat" and choose "Properties" as in the following:
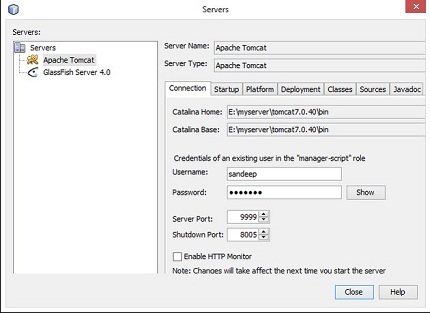
Step 3(b) :Then select the server port number that you chose in configuring the Apache Tomcat Server. Since I can choose port 9999 in Apache Tomcat so it needs to be changed in Netbeans also. As in the following:
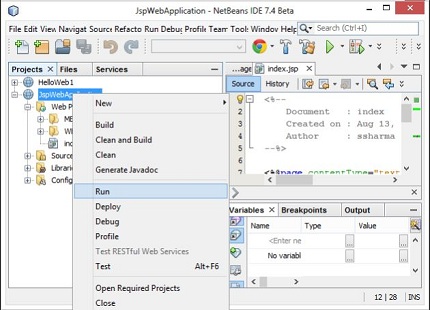
Step 3(c): And Now click on close and run the project, after that for running your project right-click on the project and select "Run" as follows.
Output :
| Previous | Home | Next |
